Friday, February 11, 2011

Adelaide's (Almost) Talking

For the last few months we've been trying to teach Adelaide to sign using her hands. We've tried words like "Daddy" (make a sign like a rooster on your forehead), "Mummy" (same thing but on your chin), and "Poh Poh" (Grandma in Cantonese, and looks like the rooster is running away). But the easiest word to learn has been "Nai Nai" (which is Milk in Cantonese, and looks like you're milking a cow).

Adelaide is now regularly signing "Nai Nai" with her hands whenever she wants to feed. There's no prompting from us, she just starts signing. We look at her and ask "Do you want Nai Nai?" and she smiles and signs again. Often with both hands, which isn't technically correct, but we give it to her. :)

But in the last few days she's started saying "Nai Nai" aloud herself in combination with the hand signs. Is this her first word? We're not 100% sure, but we'll probably know by the end of the month. She signs for "Nai Nai" so often it's become a bit of a joke at times. If "Nai Nai" is her first word, she's got plenty of opportunity to say it.

And this leads into the funny thing that happened yesterday. Adelaide was rolling around in bed (supposed quiet time while we try to get her to sleep), heaved a sigh and said something like "mamamia". She then made the sign for "Nai Nai", prompting Emily and I to sing...

Mama-mia
Here we go again
Nai nai
How can I resist ya?

Sorry, just had to share that. :)

Friday, December 24, 2010

Body Pains

Last night, I rolled over in bed and left shoulder had a brief 'pop' with a matching burst of pain. Joint weakness and pains aren't unusual for me, but the left shoulder is kind of new. My comment was something like "Argh, my left shoulder just started hurting." to which Emily replied something like "If I had a dime for every time you said 'Argh, my [x] just started hurting"...
This got us thinking. I do say things like that a lot, just because of random joint problems I have. The following is a list of a few common phrases in our house. They apply to pretty much any joint (hip, knee, elbow, shoulder, fingers, wrists) because I've had problems with all of them at some times. I've even woken up to find my fingertips 'popped out' because I'd slept on them. Twice.
  • Hmm, I think I just did something to my [x]. It doesn't feel right.
  • Hmm, my [x] just started hurting. I think that's new.
  • My [x] is playing up again. Can you do [y] for me?
  • My [x] feels odd. I'll try not to use it for a bit.
  • Heh. I stood up, and something went wrong. I should sit back down.
I used to fear that I won't be able to play with my kids the way I want to. Tow Adelaide around in the snow, carry her on my back, etc. Luckily, my body seems 'resilient'. No matter how often I get these pains, they'll go away with time and stretches.
On any given day I can never be sure of what my body will be able to do. But I can be sure that some day my joints and the planets will be aligned in their proper positions. If only for a little while.

Wednesday, December 01, 2010

Scanning With A Camera

We recently came across a bunch of old blueprints for the current house. They are too big to be scanned, but I wanted to be able to look at them on the computer. Taking a photo didn't help very much as the images were grey, uneven, and unclear:

The most obvious solution is to play with "levels" or "curves" and make the lines dark and the paper white. This works well when using a flatbed scanner, but I'm using a digital camera in uneven lighting. The paper corners were darker than the centre lines. I could not find a way to adjust the image contrast that wouldn't lose detail or create dark splotches:

It was then I discovered a neat ability of Gimp, and this is presumably available in Photoshop as well. You can follow these steps to brighten different parts of an image differently, and in proportion to how dark it is. Here's the procedure:

  1. Create a duplicate "layer" of your image. We're going to use this layer as a "light map", showing which parts of the image are bright and which are dark.
  2. Blur this duplicate layer. The amount you blur is up to you, but you basically want to remove all the sharp lines and details. You want the layer just to show where the bright regions of your image are, and where the dark regions are, without details.
  3. Set the blurred layer to "Divide" mode. Technically, this is taking the colour of your "original" image and dividing it by your "blurred" light map. Practically, this is taking every pixel of your "original" image and brightening it by looking at the average pixel colour in that area of the image. We have successfully brightened each pixel in proportion to how dark that area was.
  4. Finally adjust "levels", "curves", "contrast", "brightness", whatever you want to call it. The normal kinds of adjustments you would do to a scanned document which doesn't have enough contrast.

As you can see, the resulting image is much clearer. It isn't perfect and I'm sure some adjustment of these instructions would fix that. But it's a lot better than what we started with, and is more than sufficient for my purposes.

The next step is to try using similar steps for regular photos where one part is way too dark and another part is way too light. Will see what I come up with. :)

UPDATE: I found this photo of me presenting a workshop on Hornby island. I applied a slight variation of the above technique (I had to desaturate and then adjust the levels in the blurred image to avoid division by zero). The end result brightens everything in the image except the projector screen. This way I don't lose that incredibly important screen text, but can still see that I'm wearing a yellow shirt with green shorts...

What was I thinking?!?

Thursday, July 22, 2010

Bedtime Routine

We've been getting into a rhythm with Adelaide at bedtime. The times can vary by up to an hour, but the basic routine is:

  • 8:00pm - change from her regular clothes into a sleeper
  • 8:00pm to 8:30pm - she's very chatty and enjoys some attention
  • 8:30pm to 9:00pm - a bit of feeding to help her get to sleep
  • 9:00pm to 10:00pm - she naps while Emily and I play the Wii
  • 10:00pm - she wakes up, has another feed, then everyone sleeps until about 1am

Of course this never goes as smoothly as we would want. Tonight, it's past midnight and she's strapped to me because she couldn't seem to fall asleep in her own bed. Emily is exhausted because Adelaide is waking every two hours to feed, so I'm going to write this blog and do some coding.

But whatever happens, Adelaide does know when the bedtime routine is meant to start. A few days ago it was 8:15pm and I was changing Adelaide's diaper. She was happy and still in her regular clothes, so rather than change her into a sleeper I decided to dress her back up. After the first button she was in tears! She got this horrified look on her face and just bawled!

Similar thing again today. Emily and I took her out to see 10pm fireworks, and all is going fine until about 8:45pm. Suddenly Adelaide realises that the sun is going down and she's not in her sleeper. A happy and content baby suddenly turns to tears and sad, sad cries.

I've been told that parents can distinguish between their child's cries. In this case, we definitely can. This crying is not a "I have tummy problems!" scream or a "I'm bored!" protest. It is more like the cry when you realise you left your toddler's favourite teddy bear at the last petrol station. Or when your child is lost in a department store and can't find anyone they know. It's a "They forgot me!" kind of cry. Absolutely adorable, but it also gets you moving quickly. :)

Anyway, I'll get some coding done while Adelaide is still sleeping. I expect her to wake up within the hour for her next feed. Seems like she's not teething as we thought - it's just another growth spurt.

Thursday, July 08, 2010

Our Camping Challenge

We recently took Adelaide on her first camping trip. We mention to this to people afterwards and we get told "That was brave!". I was always told that bravery is "doing something stupid but surviving". :P Maybe if we'd known in advance we wouldn't have tried! :)
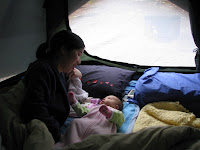
The ideal room temp for baby to sleep in is 21c, but the overnight tent temp was 11c (Emily will tell you all about my tent, which is an Australian design and has a lot of mesh walls). A lot of co-sleeping (bed-sharing) was necessary to try and keep everyone warm enough overnight.

We had hesitated to do co-sleeping because Adelaide was so tiny, and I have a tendency to roll with my elbows outwards. In the tent we had no choice, and honestly it worked out far better than I'd hoped. We both got a much better handle on Adelaide's sleeping habits, and I think we all feel a lot more connected as a family. Sharing every waking and sleeping moment does help to feel that connection.
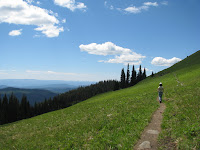
To keep ourselves sane over the course of the trip, we alternated between camping and motels. At one point we ended up at Sunpeaks Resort, a ski-resort which turns into a hiking destination in the summer. Emily just told me that Sunpeaks saved the trip. Without that break, we probably would have given up and headed home. A proper bed, with TV and a microwave, is a very nice break from cold nights and mosquitoes.

And oh yes, there were a lot of mosquitoes no matter where we camped or walked. Emily breaks out in swollen itchy patches after a mosquito bite, but I just bleed from the holes. We couldn't dare to put mosquito repellent on Adelaide, and by proxy we couldn't put any on Emily. So Emily spent a lot of her time inside the tent or car, while I spent a lot of time setting up the tent or lighting a campfire. Not complaining, but it's these little role restrictions that make camping with an infant a little bit harder.
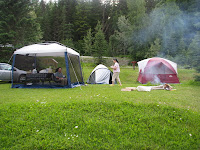
Halfway through the trip we met up with Stella and Timothy at a motel in Clearwater. We spent a few days in Wells Gray Park (awesome waterfalls!), and then made our first attempt to camp as a unified family. Stella had brought a tent and a big outdoor mesh. The mesh was big enough to cover a picnic table with extra chairs, which meant that Emily and Adelaide could spend a lot more time outside. Unfortunately Stella's tent leaked during our first camping night and she and Tim had to head home too soon.
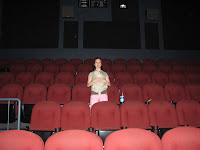
Once Stella and Timothy left, the three of us headed to Kamloops and spent a few nights camping there. The temperature rocketed up to 36c in the daytime, and so we spent parts of our days in malls, the cinema (we were almost the only ones seeing Toy Story 3 in 2D!), or hiking up and down mountains. We will have to return to Kamloops another time. The entire area reminds me of Muswellbrook, except they have sub-alpine meadows nearby... :)
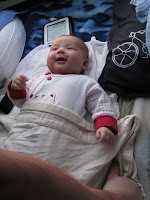
Was it worth it? Well, it was always going to be a challenge. We managed to take Adelaide camping, hiking, to waterfalls, to the movies, to the zoo, with family, in the cold, and in the heat. It was not a comfortable trip, but we got it all done. And that's what made it worth it. :)